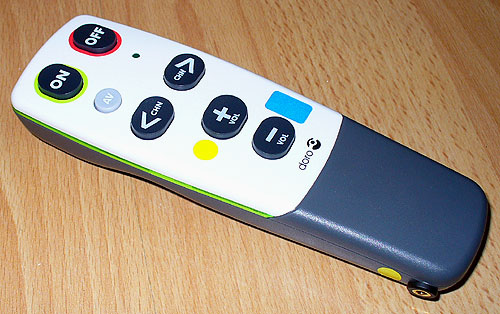
D.I.Y. Switch Adapted Learning Remote Control
This guide explains how to adapt an infra-red learning remote control, the Doro EasyHandle 321rc for use with accessibility switches. Those switches can then be used to control a wide range of infra-red controlled devices such as TVs, audio equipment and a toys such as some trainsets and the Robosapien line of toys.
If you're an absolute beginner, we strongly recommend that you follow "The Basic Soldering Guide" - by Alan Winstanley.
SAFETY: Adapting equipment voids the manufacturer's guarantee, and the attempt may cause irreparable damage. Always use adapted equipment under supervision, and disconnect power when not in use. These adaptations are at your own risk. Good luck!
Most of the basic components used here are commonly available from Electronics stores such as Maplin Electronics and Farnell. The Doro 321rc is available from the likes of Amazon and eBay.
Before you start
Accessibility switches are essentially simple on/off devices which connect to adapted equipment via 3.5mm sockets. There's only space in this brand of Doro remote for two switch sockets, but if you use a different housing or trailing leads and a barrel socket you can use five (and possibly seven but with restrictions). Also worth knowing that this device does not seem to replicate held presses. If you want to turn the volume right up for instance, you'll need to repeatedly tap your switch.
The video above is of a switch adapted Doro HandleEasy 321rc used to control the volume of a standard LCD TV.
1. What you will need

1x Doro HandleEasy 321RC Universal Remote Control
2 x 3.5mm socket (e.g. Farnell "126-7396")
Soldering iron (15 to 30 Watt power); thin solder; soldering flux; thin wire (e.g. 10 strand 0.1mm), Shrink Wrap (optional).
Drill with 7.5 mm drill bit; Knife or wire strippers; small screwdriver set; Small pliers; Hot glue gun; Small file set (optional).
2. Opening the case

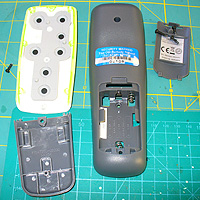
Remove the three screws that hold the controller together. You'll need to prise out a small piece of grey plastic to get to the top screw.
Carefully crack the controller apart and separate it as pictured.
3. Switch Sockets
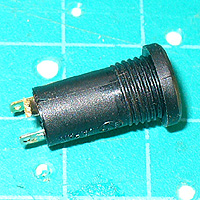
Trim the middle connection of the socket to reduce the space needed. Wire up the two outer connectors with enough wire to reach anywhere on the PCB when fitted to the case.
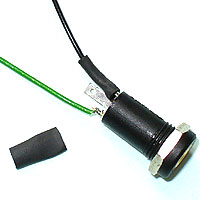
4. Fit to the case

Very carefully drill two holes in the case giving you enough space to fit the two switch sockets.
5. Solder to the PCB
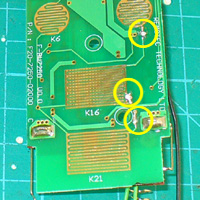
Solder the sockets to the PCB.
The top circle marks the ground (common) line. To get access to that point, you may wish to drill a tiny hole through a blank part of the circuit board. Split this wire to attach to one pole of both sockets.
Finally, solder two separate wires to connect the "+" and "-" PCB contact trace as encircled in yellow to both sockets.

6. Reassemble
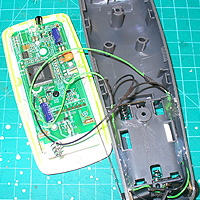
Carefully reassemble the controller. You may find using some hot-glue or blue-tack will help to keep the wires all tidily in place.
7. Testing
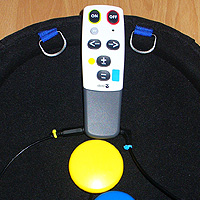
Find an infra-red controller you wish to clone. Choose a function to assign to the "+" or "-" keys by following the Doro 321rc instructions. Any problems, take a breath, dissasemble and inspect your work.
D.I.Y. Text and images PUBLIC DOMAIN 2012 - www.OneSwitch.org.uk


